A Simple Bathroom Drying Routine to Support Mold Remediation
Mold in a bathroom is rarely a one-time event. Once it appears, the underlying moisture problem usually remains, which is why bathroom mold remediation often involves more than just scrubbing visible spots. Controlling humidity and standing water after every shower is one of the most effective ways to prevent mold from returning. A consistent drying routine reduces the conditions mold needs to grow, and it makes any professional remediation effort more lasting. Below is a practical checklist to follow after each shower. Each point explains why it matters, so you understand the reasoning behind the habit.
Why Drying Matters for Bathroom Mold Remediation
Mold spores are everywhere, but they only become a problem when they land on a surface that stays damp. A typical shower deposits water on tiles, grout, glass, curtains, and fixtures. If that moisture evaporates slowly or never fully dries, mold has a chance to take hold. Bathroom mold remediation addresses existing growth and the conditions that allowed it. By drying the room thoroughly after every use, you cut off the moisture supply that feeds new colonies. This is not a substitute for professional treatment when mold has already damaged materials, but it is a reliable way to preserve a clean, dry bathroom between service visits.
The Post-Shower Drying Checklist
1. Squeegee the Walls and Glass Door
Running a squeegee over tile and glass removes the bulk of the water before it can evaporate into the air. Leaving sheets of water on vertical surfaces raises humidity and creates droplets that sit in grout lines and corners. A quick squeegee takes less than a minute and cuts drying time considerably. Focus on the lower sections of the wall, where water tends to pool. If you have a shower curtain instead of a door, shake it gently to shed excess water and leave it spread open so air circulates on both sides.
2. Wipe Down Fixtures and Hardware
Faucets, showerheads, handles, and soap dishes collect water that drips or splashes during a shower. These spots are easy to overlook, but they can develop a thin film of moisture that encourages mold along edges and crevices. A dry microfiber cloth or a towel reserved for this purpose is enough to remove the droplets. Pay attention to the base of the faucet and any seams where metal meets tile. Keeping these areas dry also helps prevent mineral buildup and corrosion over time.
3. Open or Ventilate the Space
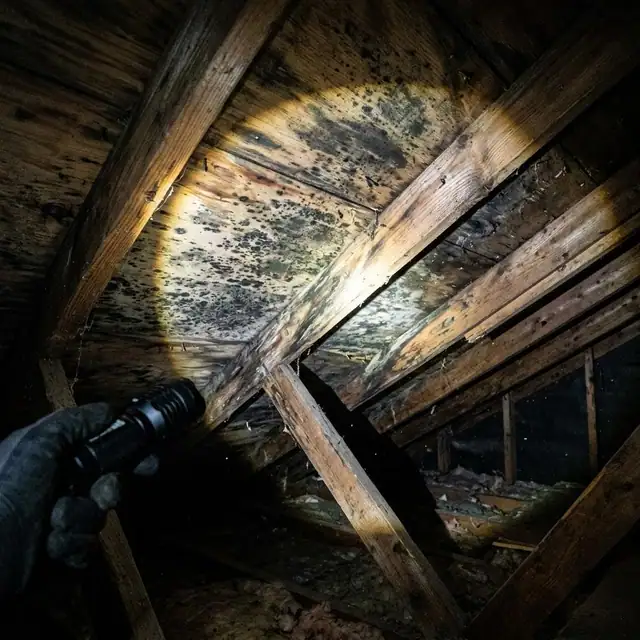
Ventilation is the quickest way to lower humidity after a shower. If the bathroom has an exhaust fan, run it for at least fifteen minutes after you finish. Fans that are ducted to the outside are more effective than recirculating units, but any airflow helps. If there is no fan, open a window if weather permits, or prop the bathroom door open to let moist air mix with drier air from the rest of the home. High humidity that lingers for hours is a prime driver of mold growth, so getting that moisture out fast is a core tactic in bathroom mold remediation.
4. Check and Dry Hidden Corners
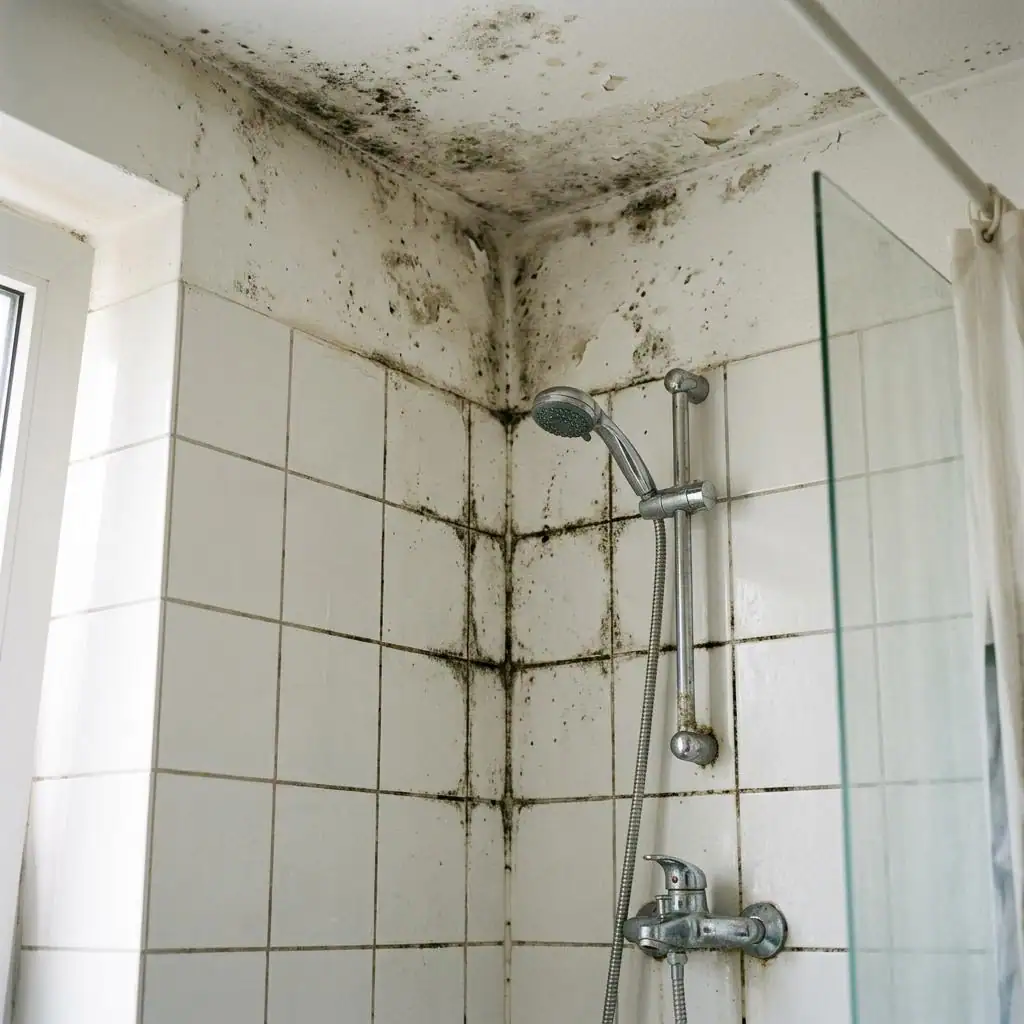
Water collects in places you cannot see easily. The corner where the shower meets the wall, behind a bottle on the corner shelf, under a soap dish, or along the edge of a shower caddy are all spots where moisture hides. Once a week, it is worth moving items and wiping those surfaces. For the daily routine, a quick glance at the corners and a pass with a dry cloth will catch most of the leftover water. Over time, this habit prevents the dark spots that often appear in grout and caulk lines, which are difficult to clean once mold sets in.
5. Hang Wet Items to Dry
Bath mats, towels, washcloths, and loofahs stay damp for hours if they are bunched up or left on the floor. Wet fabric against tile or a wooden cabinet creates a humid microclimate that supports mold. Spread towels on a bar so air can reach both sides. Hang bath mats over the edge of the tub or a rack rather than leaving them flat on the floor. Loofahs and sponges should be squeezed out and placed in a holder that allows drainage. A bathroom that dries quickly after a shower will keep these items fresher as well, reducing musty smells.
How This Routine Supports Professional Remediation
Bathroom mold remediation performed by a service like Mold Removal Boston Pros typically involves removing visible mold, treating hidden moisture issues, repairing damaged materials, and improving ventilation. These steps address existing problems and the underlying causes. However, the environment in a bathroom changes daily based on how it is used. A thorough drying routine helps maintain the results of professional work by keeping moisture levels low between visits. It also reduces the chance that a small patch of mold behind a cabinet or under a sink will spread before it is noticed.
For example, grout and caulk are common areas where mold returns after treatment. These materials are porous and hold moisture longer than glazed tile. By drying them after every shower, you deprive mold of the sustained dampness it needs to recolonize. The same logic applies to the area around the base of the toilet and under the edge of the sink. A few seconds of attention each day can prevent a recurrence that would require another call for service.
The phrase "moldremovalboston.org" is a resource worth consulting if you are dealing with persistent mold that does not respond to surface cleaning. The advice on their site complements the daily habits described here, offering guidance on when to seek professional assessment and what to expect from a thorough remediation process.
Common Mistakes to Avoid
Even with good intentions, people sometimes develop habits that work against their drying efforts. Leaving the shower curtain bunched at one end traps moisture against the wall. Closing the bathroom door immediately after a shower locks humidity inside. Using a dirty rag to wipe surfaces can spread spores rather than remove them. Being aware of these pitfalls helps you adjust your routine.
Another common error is assuming that a bathroom looks dry when it is not. Tiles can appear dry to the eye while grout lines and corners remain damp. Running a hand along a seam or the bottom edge of the shower door will tell you more than a glance. A few extra wipes in those spots make the difference between a room that dries fully and one that stays humid enough for mold.
When to Look Beyond the Daily Routine
If you follow a consistent drying routine and still see mold returning in the same spots, there may be a larger issue. Leaking pipes, failed caulk, insufficient ventilation, or water wicking through porous materials can keep a bathroom damp no matter how well you wipe surfaces. In those cases, bathroom mold remediation needs to address the source of moisture, not just the surface conditions. A professional team like Mold Removal Boston Pros can inspect the bathroom and identify hidden problems that a daily drying routine cannot fix.
Signs that you need more than a checklist include musty odors that persist after drying, soft or discolored drywall near the shower, peeling paint on the ceiling, and visible mold that returns within days of cleaning. These suggest that moisture is entering the structure itself. Addressing it may involve removing damaged materials, sealing leaks, or upgrading the ventilation system. The daily drying routine then becomes a maintenance step that protects the repair work.
Making the Routine Stick
Building a new habit is easier when you pair it with something you already do. Keep the squeegee and a dedicated drying cloth within reach of the shower so you do not have to search for them. Set the exhaust fan on a timer or leave a note on the bathroom mirror as a reminder. After a week, the steps start to feel automatic. The time investment is small, and the payoff in reduced mold growth and easier cleaning is tangible.
For households with multiple people, it helps to agree on the routine so everyone follows the same steps. A quick checklist posted inside a cabinet door can serve as a reminder. Over time, the practice becomes part of the normal bathroom use cycle, and the need for repeated mold remediation drops. The site moldremovalboston.org provides additional context on how moisture control fits into a broader strategy for keeping a bathroom healthy, especially in older homes common to the Boston area where ventilation may be limited.
In the end, drying a bathroom after every shower is a small effort that supports a larger goal. It keeps the space fresh, protects surfaces from long-term moisture damage, and makes professional bathroom mold remediation more effective and longer lasting. By turning this checklist into a daily habit, you take control of the one factor that matters most for mold prevention: moisture.